What Is a Golf Simulator Sound System and Why Does It Matter?
A golf simulator sound system reproduces realistic course ambiance, ball impact feedback, and swing mechanics audio cues. Quality sound transforms your home golf setup from a visual experience into a fully immersive environment. In June 2026, audio integration has become essential for serious golfers building indoor practice spaces. Sound affects your swing confidence, focus, and overall enjoyment of virtual rounds. Many golfers overlook audio during setup, but it directly impacts shot feedback and learning outcomes.
The right sound system enhances ball strike detection, wind direction cues, and crowd reactions on virtual greens. Professional simulators like those used in tour facilities prioritize acoustic design alongside visual display. Your home setup benefits equally from proper speaker placement, frequency response, and volume calibration. Sound quality also influences how your simulator software—whether GSPro, E6 Connect, or other platforms—delivers feedback to your swing. Investing in audio setup now prevents costly upgrades later.
Key Takeaway: Sound systems are critical components of immersive golf simulation, not optional accessories.
What Are the Essential Components of a Golf Simulator Sound System?
A complete golf simulator audio setup requires multiple components working together. You’ll need powered speakers, an audio receiver or amplifier, wiring infrastructure, and acoustic treatment. Each component serves a specific purpose in delivering clear, directional sound. In 2026, most home setups use either 2.1 stereo systems or 5.1 surround configurations. Your choice depends on room size, budget, and desired immersion level.
Core Audio Components
Powered speakers contain built-in amplifiers and eliminate the need for separate amp units. Passive speakers require external amplification but offer more customization options. Subwoofers add low-frequency impact for realistic ball strikes and ambient course sound. Audio receivers handle signal routing from your simulator computer or launch monitor. Quality cables ensure clean signal transmission without interference or degradation.
- Powered speakers: Self-contained, easier installation, ideal for small to medium rooms.
- Passive speakers: Require external amp, higher fidelity potential, better for larger spaces.
- Subwoofers: Enhance low-end frequencies, improve realism of ball contact sounds.
- Audio receiver: Routes signals, manages volume control, enables surround configurations.
- Quality cables: Minimize noise, prevent signal loss over longer distances.
Key Takeaway: Select powered speakers for simplicity or passive speakers for advanced customization.
How Do You Choose the Right Speakers for Your Golf Simulator?
Speaker selection depends on your room dimensions, budget, and audio quality expectations. Measure your space carefully before purchasing. A typical golf simulator enclosure (8×10 feet) requires different speaker specs than a dedicated garage setup. Frequency response, impedance rating, and wattage are critical specifications to evaluate. In June 2026, mid-range speakers offer excellent value for home simulators without excessive cost.

Speaker Specifications to Consider
Frequency response indicates which sounds your speakers reproduce accurately. Golf simulators require 20Hz to 20kHz range for full audio spectrum coverage. Impedance (measured in ohms) must match your amplifier specifications for safe operation. Wattage determines maximum volume and dynamic range in your space. Sensitivity rating (dB) shows how loud speakers play at given wattage levels.
- Frequency response 20Hz-20kHz: Covers full audio spectrum from bass to treble.
- 8-ohm impedance: Standard for most home audio setups, compatible with most receivers.
- 50-100 watts per speaker: Sufficient for average-sized golf simulator rooms.
- 85dB sensitivity or higher: Achieves adequate volume without excessive power draw.
- Bookshelf or tower designs: Bookshelf speakers suit compact spaces; towers work in larger rooms.
Budget-friendly options like Edifier or Klipsch speakers deliver solid performance for golf simulator use. Premium brands like Bowers & Wilkins or KEF provide superior sound quality if budget allows. Test speakers with actual golf simulator audio samples before purchasing when possible. Many retailers offer return policies allowing home auditions. Your simulator software produces specific audio frequencies that certain speakers reproduce better than others.
Key Takeaway: Match speaker specifications to your room size and prioritize frequency response over brand recognition.
What Speaker Placement Strategy Works Best for Golf Simulators?
Speaker placement dramatically affects sound quality and directional accuracy in your simulator space. Improper positioning creates dead zones, echo, or muddy audio that degrades your experience. The golden rule involves positioning speakers at ear level when seated in your golf posture. Avoid placing speakers directly in room corners where bass frequencies accumulate and distort. In 2026 setups, most golfers use stereo pair placement (left and right) rather than single-speaker configurations.
Optimal Placement Techniques
Position main speakers 6-8 feet apart at 30-degree angles from your hitting position. This configuration creates an immersive soundstage without overwhelming directional cues. Elevation matters—speakers should sit at ear level when you’re in your golf stance. Mount speakers on stands, shelves, or wall brackets to achieve proper height. Avoid placing speakers on the ground where bass frequencies become boomy and unclear.
- 30-degree angle positioning: Creates optimal stereo image and sound localization.
- Ear-level height: Ensures balanced frequency response during your golf swing.
- 6-8 feet separation: Provides adequate stereo width for average room sizes.
- Away from corners: Prevents bass buildup and acoustic reflections.
- Symmetrical arrangement: Maintains balanced sound from both sides of the simulator.
If adding subwoofers, position them away from walls initially to test bass response. Subwoofers are typically non-directional, so placement flexibility is greater. Experiment with subwoofer position by moving it around your space and listening for even bass distribution. The best location often differs from what you’d expect. Mark positions with tape and evaluate each location before permanent installation.
Key Takeaway: Position speakers at ear level, 30 degrees apart, away from corners for optimal sound.
How Do You Integrate Sound with Your Golf Simulator Hardware?
Audio integration requires proper wiring between your simulator computer, launch monitor, and speaker system. Most modern golf simulators use USB or 3.5mm audio outputs to connect to speakers. Your audio receiver acts as the central hub routing signals to all speakers. In June 2026, wireless speaker options have improved, but wired connections remain more reliable for serious setups. Proper cable management prevents interference and maintains clean signal paths throughout your installation.
Wiring and Connection Methods
USB audio connections work directly with most simulator computers without additional hardware. 3.5mm headphone jack outputs provide simple analog connections to powered speakers. RCA cables offer balanced audio transmission over longer distances with minimal signal loss. XLR connections deliver professional-grade audio quality for high-end setups. Optical digital connections eliminate electrical noise in interference-prone environments.
- USB audio: Direct digital connection, no additional equipment needed.
- 3.5mm jack: Simple analog connection, works with most powered speakers.
- RCA cables: Balanced analog transmission, good for 15-25 foot runs.
- XLR connectors: Professional-grade balanced audio, ideal for long cable runs.
- Optical digital: Noise-free transmission, eliminates ground loop issues.
Most golf simulator software (GSPro, E6 Connect, and others) outputs audio through standard computer sound cards. Configure your computer’s audio settings to direct simulator sound to your speaker system. Test audio output levels before your first round to prevent distortion or inadequate volume. Volume calibration should match your simulator’s visual feedback for synchronized ball impact sounds. Wireless systems introduce latency that can desynchronize audio with on-screen ball strikes.
Key Takeaway: Use wired connections for reliability; configure computer audio settings to direct simulator output to speakers.
What Acoustic Treatment Improves Golf Simulator Sound Quality?
Acoustic treatment controls reflections, reduces echo, and optimizes frequency response in your simulator space. Hard surfaces like concrete, drywall, and tile create excessive reflections that muddy audio clarity. Adding absorption materials improves sound quality without expensive speaker upgrades. In June 2026, affordable acoustic panels and bass traps deliver professional results in home setups. Strategic placement of absorption materials transforms mediocre-sounding rooms into acoustically optimized spaces.
Acoustic Treatment Materials and Placement
Acoustic foam panels absorb mid and high-frequency reflections from walls and ceilings. Fiberglass panels offer better performance than foam at a slightly higher cost. Bass traps target low-frequency buildup in room corners where bass energy accumulates. Heavy curtains or blankets provide temporary absorption for testing before permanent installation. Carpeting and rugs significantly reduce reflections from hard floors.
- Acoustic foam panels: Affordable, easy installation, effective for mid-high frequencies.
- Fiberglass absorption: Superior performance, professional appearance, higher cost.
- Bass traps: Target corner resonances, essential for balanced low-frequency response.
- Heavy curtains: Temporary solution, test acoustics before permanent panels.
- Area rugs and carpeting: Reduce floor reflections, improve overall acoustic balance.
Begin acoustic treatment by identifying problem areas in your space. Clap your hands and listen for excessive echo—this indicates need for absorption. Treat first-reflection points (where sound bounces from walls to your ears) before treating entire room. A typical golf simulator room needs 15-25% of wall surface covered with absorption material. Start with minimal treatment and add more based on listening tests and feedback.
Key Takeaway: Strategic acoustic panels and bass traps dramatically improve sound clarity without expensive speaker upgrades.
How Do You Calibrate and Optimize Your Golf Simulator Audio?
Proper calibration ensures your sound system delivers accurate, balanced audio that enhances simulator gameplay. Volume levels should match visual feedback—ball strike sounds synchronize with on-screen impact. Frequency response balance affects how realistically your simulator reproduces course ambiance. Testing with reference audio helps identify any problematic frequencies or dead zones. In June 2026, most simulator software includes audio calibration tools within their settings menus.
Calibration Steps and Testing Methods
Start by setting volume levels using your simulator software’s built-in test tones. Measure sound pressure levels using a smartphone SPL meter app at your hitting position. Adjust speaker volume controls until test tones read 75-80dB at your normal playing distance. This level provides clear feedback without excessive volume that causes fatigue. Document your calibration settings for reference if you need to reset later.
- Use test tone generators: Most simulator software includes audio testing utilities.
- Measure with SPL meter: Target 75-80dB at hitting position for optimal levels.
- Balance left and right channels: Ensure stereo image is centered at your stance.
- Test with actual rounds: Play full 9-18 holes to evaluate audio during real gameplay.
- Fine-tune EQ settings: Adjust bass, mid, treble if available on your receiver.
Play several practice rounds with your calibrated system before making additional adjustments. Your ears need time to acclimate to the audio environment. Record your calibration settings (volume levels, EQ adjustments, speaker distances) in a document for future reference. Most issues resolve within the first few hours of use as you become familiar with your system. Avoid over-adjusting based on single listening sessions—consistent feedback across multiple rounds indicates proper calibration.
Key Takeaway: Calibrate to 75-80dB at your hitting position and test across multiple rounds before fine-tuning.
What Practical Steps Should You Follow to Install Your Sound System?
A systematic installation approach prevents mistakes and ensures your system performs optimally. Plan your installation timeline, gather all components, and prepare your space before beginning. Most home golf simulator sound systems can be installed in 2-4 hours by a single person. Following a logical sequence prevents rework and ensures all connections function properly. In June 2026, most golfers complete DIY installations without professional audio technician assistance.
Step-by-Step Installation Process
- Plan speaker placement: Measure your room, mark speaker positions, verify 30-degree angles and ear-level height.
- Prepare mounting hardware: Gather stands, brackets, wall anchors, and all fastening materials needed.
- Install acoustic treatment: Apply panels to first-reflection points and corner bass traps before speaker installation.
- Mount speakers: Secure speakers to stands or walls, verify stability and proper angle orientation.
- Run audio cables: Route cables from simulator computer to speakers, use cable management to prevent tripping hazards.
- Connect power: Plug powered speakers into dedicated outlet, avoid extension cords if possible.
- Configure computer audio: Set simulator software audio output to your speaker system in operating system settings.
- Test connections: Play test tones, verify audio from all speakers, check for any buzzing or distortion.
- Calibrate levels: Adjust volume controls to target 75-80dB at your hitting position using SPL meter.
- Run practice rounds: Play full simulator rounds, evaluate audio quality, make final adjustments as needed.
Key Takeaway: Follow a systematic installation sequence to avoid rework and ensure optimal system performance.
What Common Mistakes Should You Avoid When Setting Up Golf Simulator Audio?
Understanding common pitfalls helps you avoid expensive mistakes and frustration during installation. Many golfers overlook acoustic treatment, assuming speaker quality alone ensures good sound. Others position speakers incorrectly, creating unbalanced or muddy audio that degrades the simulator experience. Inadequate cable quality or improper connections introduce noise and signal degradation. In June 2026, most installation problems stem from rushing the process rather than technical complexity.
- Ignoring acoustic treatment: Hard rooms require absorption for clear, balanced audio.
- Poor speaker placement: Corners and floor placement create bass buildup and dead zones.
- Undersized speakers: Insufficient power limits volume and dynamic range in larger spaces.
- Wireless audio delays: Bluetooth latency desynchronizes audio with on-screen ball strikes.
- Excessive volume: Levels above 85dB cause listening fatigue and hearing damage over time.
- Cheap cables: Budget cables introduce noise, interference, and signal degradation.
Take time during planning to avoid these mistakes. Measure your space accurately and choose speakers with adequate specifications. Prioritize acoustic treatment alongside speaker selection. Test your system thoroughly before considering installation complete. Most problems discovered early require simple adjustments rather than expensive replacements. Document your setup process so you can troubleshoot issues or replicate your configuration if needed.
Key Takeaway: Avoid rushing installation; invest in acoustic treatment and proper speaker placement for optimal results.
How Does Your Sound System Enhance Your Overall Golf Simulator Experience?
Quality audio transforms golf simulators from visual-only experiences into fully immersive environments. Realistic sound feedback improves your ability to assess shot quality and learn from swing mechanics. Wind direction cues, crowd reactions, and environmental ambiance create psychological immersion that enhances focus. In June 2026, golfers with proper audio systems report significantly higher engagement and enjoyment during practice sessions. Sound quality also affects how effectively you learn from your simulator’s feedback data.
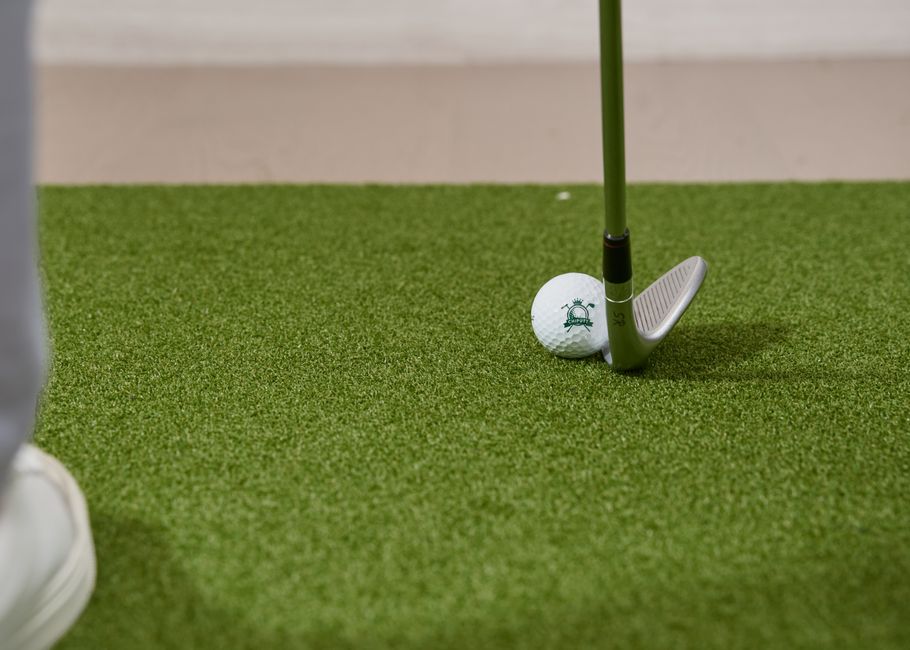
Ball strike sounds provide immediate feedback about contact quality that visual display alone cannot convey. Solid strikes produce crisp, clean sounds while mishits create distinctive audio signatures. This auditory feedback trains your muscle memory and helps develop consistent swing mechanics. Ambient course sounds—wind, water, crowd—create realistic playing conditions that transfer to on-course performance. Your simulator becomes a legitimate training tool rather than just entertainment when audio quality matches visual quality.
Key Takeaway: Proper audio integration transforms simulators into effective training tools with enhanced immersion and feedback.
What Should You Do If Your Sound System Isn’t Performing as Expected?
Troubleshooting audio issues requires systematic diagnosis to identify the root cause. Start by verifying all connections are secure and properly configured. Check that simulator software is routing audio to the correct output device. Test individual speakers to isolate whether issues affect the entire system or specific speakers. Most problems resolve through simple adjustments rather than equipment replacement. In June 2026, community forums and manufacturer support provide excellent troubleshooting resources.
Common Troubleshooting Scenarios
- No sound output: Verify audio connections, check computer audio settings, test with different audio source.
- Distorted audio: Reduce volume levels, check for speaker damage, verify cable connections.
- Unbalanced stereo: Adjust individual speaker volume controls, verify speaker placement symmetry.
- Buzzing or humming: Check for ground loop issues, use different power outlet, verify cable shielding.
- Weak bass response: Reposition subwoofer, adjust subwoofer volume control, verify low-frequency settings.
- Delayed audio: Switch to wired connections if using wireless, check for Bluetooth interference.
Document your troubleshooting steps and results to help identify patterns. Many issues resolve through simple configuration adjustments in your operating system or simulator software. Consult your speaker and receiver manuals for device-specific troubleshooting guidance. Contact manufacturer support if issues persist after basic troubleshooting. Keep your installation documentation accessible for reference during future maintenance.
Key Takeaway: Systematic troubleshooting identifies most audio issues; document steps for future reference.
Frequently Asked Questions
Do I need surround speakers for my golf simulator sound system?
Surround speakers enhance immersion but aren’t essential for basic golf simulator functionality. A quality stereo pair delivers excellent ball strike feedback and course ambiance. Add surround speakers if your budget allows and your room layout permits proper placement. Five-point-one configurations create more realistic environments but require more complex installation and calibration.
What’s the ideal volume level for golf simulator audio?
Target 75-80dB at your hitting position using an SPL meter app. This level provides clear feedback without causing listening fatigue during extended practice sessions. Avoid excessive volume above 85dB, which can damage hearing and reduce enjoyment over time. Your specific preference may vary slightly based on personal hearing sensitivity and room acoustics.
Can I use home theater speakers for my golf simulator?
Home theater speakers work well for golf simulators if they have appropriate frequency response and impedance ratings. Verify compatibility with your audio receiver before purchasing. Golf simulators benefit from speakers optimized for clarity across the full audio spectrum rather than cinematic emphasis. Test speakers with actual simulator audio samples when possible before committing to purchase.
How much should I budget for a complete golf simulator sound system in 2026?
Budget $300-800 for a quality stereo speaker setup with basic acoustic treatment. Premium systems with surround speakers and professional amplification cost $1000-3000. Entry-level powered speakers under $200 work for casual simulators, but mid-range options ($400-600) deliver significantly better sound quality. Acoustic treatment costs $200-500 depending on room size and material choices.
Should I hire a professional to install my golf simulator sound system?
Most home golfers successfully install sound systems themselves following proper guidelines. Professional installation costs $300-800 but ensures optimal configuration and troubleshooting. DIY installation saves money and helps you understand your system for future maintenance. Consider professional help if your space has complex acoustics or you’re uncomfortable with electrical connections.
How does audio quality affect golf simulator software performance?
Audio quality doesn’t affect simulator software processing, but it significantly impacts your learning experience and enjoyment. Better sound systems provide clearer feedback about swing mechanics and shot quality. This improved feedback helps you learn more effectively from your simulator’s data. Audio quality also influences how realistically your simulator reproduces actual course conditions for better skill transfer.
How Can You Build a Complete Golf Simulator Audio Setup in 2026?
Building a complete golf simulator sound system requires careful planning, component selection, and methodical installation. Start by assessing your space dimensions and identifying acoustic challenges. Choose speakers that match your room size and budget, prioritizing frequency response over brand prestige. Invest in acoustic treatment before installation to maximize your speaker investment. Position speakers strategically at ear level with proper angles for optimal stereo imaging.
Install cables systematically, configure your computer audio settings, and calibrate volume levels to 75-80dB at your hitting position. Test your system across multiple simulator rounds before considering installation complete. Make adjustments based on actual gameplay feedback rather than single listening sessions. Document your configuration, settings, and troubleshooting steps for future reference. A properly configured golf simulator sound system transforms your practice experience, providing realistic feedback that enhances learning and enjoyment.
Your audio investment compounds over time as improved feedback accelerates skill development. In June 2026, quality sound systems have become essential components of serious home golf simulator setups. Whether you’re building a budget system under $500 or a premium installation exceeding $2000, the principles remain consistent: proper placement, adequate acoustic treatment, and systematic calibration. Start with stereo speakers and expand to surround configurations as your budget and space allow. Your golf simulator becomes a legitimate training tool when audio quality matches its visual capabilities.
Key Takeaway: Plan systematically, invest in acoustic treatment, position speakers carefully, and calibrate thoroughly for optimal golf simulator audio performance.


Write Your Review
No reviews yet. Be the first to share your experience!