What Space Do You Need for Rapsodo MLM2Pro Indoor Setup?
Quick Answer: The Rapsodo MLM2Pro requires a minimum of 10 feet of depth and 8 feet of width for safe, accurate operation in 2026. However, a dedicated 12×15-foot space delivers optimal performance, allowing full swing mechanics and proper camera positioning. Most home golf simulators perform best in rooms with 10–12 feet of ceiling height and controlled lighting. The launch monitor itself is compact—roughly the size of a small tablet—but the space around your hitting area matters significantly for accuracy and safety during indoor play.
Setting up a home golf simulator is an exciting investment. The Rapsodo MLM2Pro has become one of the most popular launch monitors for indoor enthusiasts because of its accuracy and affordability. However, many golfers underestimate the space demands before purchasing. Understanding your room’s dimensions helps you avoid costly mistakes and ensures your system works as intended. This guide walks you through everything you need to know about creating the perfect Rapsodo MLM2Pro indoor setup space.
What Are the Minimum Space Requirements for Rapsodo MLM2Pro?
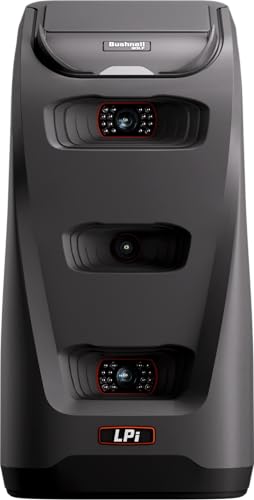
The Rapsodo MLM2Pro itself is remarkably small and portable. The device weighs about 1.5 pounds and measures roughly 5 inches wide. You can move it easily between rooms or even take it to the range. The real space challenge comes from the hitting area and camera placement, not the monitor itself.
For basic operation, you need at least 10 feet of depth from your hitting position to the back wall. This distance allows the camera to capture your swing and ball flight accurately. Width-wise, 8 feet provides adequate space for a natural stance and shoulder turn. Anything smaller than these minimums will compromise the system’s ability to read swing data and ball characteristics reliably.
- Minimum depth: 10 feet from hitting position to back wall
- Minimum width: 8 feet for comfortable stance and swing
- Ideal ceiling height: 10–12 feet to avoid contact with club or ball
- MLM2Pro device size: Compact, roughly 5 inches wide and 1.5 pounds
- Camera placement: Mounted 3–4 feet behind the ball position
Key Takeaway: The Rapsodo MLM2Pro’s small footprint is deceiving—your room dimensions matter far more than the device size.
How Should You Position the Camera and Monitor in Your Space?
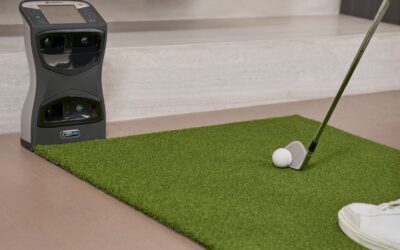
Camera placement is critical for accurate shot detection and swing analysis. The Rapsodo MLM2Pro uses a high-speed camera to track ball flight and club data. Position the camera 3–4 feet behind the ball, elevated 2–3 feet above ground level. This angle captures the entire swing arc and initial ball trajectory. Avoid placing it directly on the ground or too high, as both positions reduce accuracy.
The launch monitor itself mounts on a small stand or tripod. Keep it stable and level on a table or dedicated stand positioned near the camera. Ensure no obstructions block the camera’s view of your swing or the ball’s flight path. Reflective surfaces, bright lights, or moving objects in the background can interfere with the system’s tracking capabilities.
Optimal Camera Height and Angle Setup
Mount your camera at a 45-degree angle if possible. This positioning captures both the club face and ball flight simultaneously. The camera should sit approximately 3–4 feet behind the ball position and 2–3 feet above ground. Test different heights to find what works best in your specific room layout. Even small adjustments can improve data accuracy significantly.
- Camera height: 2–3 feet above ground level
- Camera distance: 3–4 feet behind ball position
- Optimal angle: 45 degrees to capture club and ball flight
- Mounting: Use a stable tripod or wall bracket
- Background: Keep area clear of reflective or moving objects
Key Takeaway: Proper camera positioning directly impacts data accuracy and shot detection reliability.
What Lighting Conditions Work Best for Rapsodo MLM2Pro Indoor Setup?
Lighting significantly affects the MLM2Pro’s performance. The camera relies on visual data to track ball flight and swing mechanics. Inconsistent or dim lighting creates shadows that confuse the system. Bright, even lighting across your hitting area and downrange space is essential for accurate readings.
Avoid direct sunlight streaming through windows, as it creates glare and harsh shadows. Instead, use adjustable LED panels or overhead lights that provide uniform illumination. Aim for 500–1000 lux (about 50–100 foot-candles) of light intensity across your hitting zone. Test your setup by hitting a few shots and checking the data consistency on your app.
Best Lighting Setup for Accuracy
Overhead lighting works better than side lighting. Install lights on the ceiling or upper walls to minimize shadows around the hitting area. Avoid placing lights directly behind you, as they create backlighting issues. Consider dimmable LED panels so you can adjust brightness for different times of day and room conditions.
- Recommended light intensity: 500–1000 lux across hitting area
- Overhead positioning: Lights mounted on ceiling or upper walls
- Avoid: Direct sunlight, backlighting, and harsh shadows
- Best option: Adjustable LED panels for consistent illumination
- Test: Hit practice shots to verify data consistency
Key Takeaway: Uniform, overhead lighting is the foundation of accurate Rapsodo MLM2Pro performance indoors.
What Surface and Flooring Work Best for Your Indoor Setup Space?
Your flooring affects both safety and shot accuracy. A firm, level surface is essential. Concrete, tile, or hardwood flooring works well for launch monitor setups. Avoid thick carpeting directly under your hitting position, as it can affect ball roll data and create tripping hazards during your swing.
Consider installing a hitting mat in your swing area. Quality golf mats provide a realistic hitting surface and protect your floor. Place the mat directly in front of your hitting position, extending about 3–4 feet forward. This setup mimics real golf and reduces wear on your flooring while improving shot consistency data.
Mat Selection and Placement Strategy
A 4×6-foot hitting mat works well for most home setups. Position it so the MLM2Pro camera captures your entire swing. Ensure the mat sits flat and level—any wrinkles or unevenness can affect your stance and swing mechanics. High-quality mats with realistic turf and impact zones provide better feedback and durability.
- Mat size: 4×6 feet is ideal for most home spaces
- Surface: Realistic turf with impact zone markings
- Placement: Directly under hitting position, extending 3–4 feet forward
- Base flooring: Concrete, tile, or hardwood for stability
- Avoid: Thick carpeting that affects ball roll data
Key Takeaway: A quality hitting mat on firm flooring optimizes both accuracy and safety in your indoor space.
How Do You Maximize a Small Room for Rapsodo MLM2Pro Setup?
Not everyone has a spacious basement or spare room. If your space is tight, strategic planning helps you work within constraints. A 10×10-foot room is the bare minimum for functional use. Utilize vertical space for storage and keep your setup organized to maximize the available hitting area. Remove furniture, boxes, and clutter from your swing path and downrange zone.
Consider using a net or screen to contain ball flight. This allows you to practice in tighter spaces without worrying about damage. The Rapsodo MLM2Pro’s camera tracks the ball regardless of whether it hits a net, so you won’t lose data accuracy. Nets also reduce noise and create a safer practice environment for indoor play.
Space-Saving Setup Strategies
Vertical storage solutions are your friend in compact spaces. Mount shelves for balls, tees, and accessories above your hitting area. Use wall-mounted stands for your camera and monitor. Keep cords organized with clips to prevent tripping hazards. Every square foot counts in a small room, so thoughtful organization is essential.
- Minimum viable space: 10×10 feet for basic operation
- Use nets: Contains ball flight in tight spaces
- Vertical storage: Mount shelves and wall brackets
- Cord management: Organize cables to prevent hazards
- Remove clutter: Clear all obstacles from swing path
Key Takeaway: Small spaces work if you organize strategically and use nets to contain ball flight.
What About Ceiling Height and Ball Flight Clearance?
Ceiling height is often overlooked but critically important. A minimum of 9 feet is necessary to avoid hitting the ceiling with your club during your swing. However, 10–12 feet is ideal for a full, unrestricted swing. Low ceilings force you to modify your swing mechanics, which reduces the accuracy of the MLM2Pro’s data collection. Your natural swing is what the system is designed to capture.
Ball flight space matters too. Ensure at least 10 feet of clear space from your hitting position to the back wall or net. The camera needs to track the ball’s trajectory accurately. If you’re using a net, place it at least 10 feet away. This distance gives the system enough time to capture initial ball characteristics before the ball strikes the net.
- Minimum ceiling height: 9 feet for club clearance
- Ideal ceiling height: 10–12 feet for full swing
- Downrange clearance: At least 10 feet to back wall or net
- Net placement: 10+ feet from hitting position
- Avoid: Modified swings that reduce data accuracy
Key Takeaway: Adequate ceiling height and downrange clearance ensure natural swings and accurate data capture.
How Does Your Room Layout Compare to Professional Standards?
Professional golf simulator studios typically use 12×15-foot rooms with 12-foot ceilings. This is the gold standard for launch monitor setups. However, most home users operate successfully in smaller spaces. Understanding professional standards helps you understand what compromises you might make at home. The difference between a 10×10-foot room and a 12×15-foot room is noticeable but not prohibitive for casual practice and improvement.
Compare your space to industry recommendations before finalizing your setup. If you fall short in one dimension, compensate with excellent lighting, a quality mat, and careful camera positioning. Many golfers achieve great results in non-ideal spaces through attention to detail and proper equipment placement. Visit Rapsodo MLM2Pro vs Garmin R10 comparison to see how space requirements differ between launch monitors.
What Practical Steps Should You Take to Set Up Your Space?
Setting up your Rapsodo MLM2Pro indoor space requires planning and execution. Follow these actionable steps to create an optimal environment for accurate, enjoyable practice sessions at home.
- Measure your room: Document length, width, and ceiling height. Ensure minimum dimensions of 10×8 feet with 9-foot ceilings.
- Plan camera placement: Mark a position 3–4 feet behind where the ball will sit, at 2–3 feet height.
- Install lighting: Add overhead LED panels or adjustable lights to achieve 500–1000 lux across your hitting area.
- Choose flooring: Ensure firm, level flooring. Install a 4×6-foot hitting mat for realistic practice.
- Mount the camera: Use a stable tripod or wall bracket. Test the angle and position with practice shots.
- Set up the monitor: Place the MLM2Pro device on a stable stand near your camera setup.
- Clear obstacles: Remove furniture, boxes, and clutter from your swing path and downrange area.
- Install containment: Add a net or screen 10+ feet away to contain ball flight safely.
- Test and adjust: Hit practice shots and review data consistency. Fine-tune lighting and camera position as needed.
- Organize accessories: Use vertical storage for balls, tees, and other items to maximize space.
These steps create a functional, accurate Rapsodo MLM2Pro setup in your home. Start with measurements and work systematically through camera placement, lighting, and flooring. Test your setup with practice shots and adjust as needed. Small refinements often yield significant improvements in data accuracy and user experience.
Key Takeaway: Systematic setup following these steps ensures your indoor space maximizes Rapsodo MLM2Pro performance.
Frequently Asked Questions
Can I use the Rapsodo MLM2Pro in a garage?
Yes, garages work well for Rapsodo MLM2Pro setups if they meet space requirements. Ensure your garage is at least 10 feet deep, 8 feet wide, and has 9+ feet of ceiling clearance. Install proper lighting to overcome dim garage conditions. Concrete flooring is ideal. Ensure good ventilation and temperature control, as extreme cold or heat can affect camera performance.
What’s the ideal room temperature for accurate readings?
The Rapsodo MLM2Pro performs best between 60–75°F. Extreme temperatures can affect camera sensitivity and data accuracy. Maintain consistent room temperature year-round if possible. If your space gets very hot or cold, allow the system to acclimate for 15–20 minutes before practice sessions. Avoid direct sunlight heating your setup area, as temperature fluctuations reduce reliability.
Do I need a hitting net for accurate Rapsodo MLM2Pro data?
No, a net is optional. The MLM2Pro captures ball flight data before the ball travels far, so nets don’t interfere with accuracy. However, nets are highly recommended for safety and damage prevention in home setups. They contain ball flight, reduce noise, and allow practice in smaller spaces. Choose a quality net positioned 10+ feet from your hitting position.
How close can I place the camera to my hitting position?
The camera should be 3–4 feet behind the ball position at minimum. Closer placement may cause focus issues and limit the system’s ability to track the entire swing arc. Farther placement (up to 6 feet) works but reduces accuracy. Optimal positioning is 3–4 feet back at 2–3 feet height for balanced swing and ball flight capture.
Can I set up the Rapsodo MLM2Pro in a bedroom or living room?
Technically yes, but it’s not ideal. Bedrooms and living rooms often lack adequate ceiling height and space. You’ll need to modify your swing significantly, which reduces data accuracy. These rooms also typically have furniture, flooring, and lighting unsuitable for golf practice. A basement, garage, or dedicated space is far better for consistent, accurate practice sessions with the MLM2Pro.
What should I do if my ceiling is only 8 feet high?
An 8-foot ceiling is below the recommended minimum and will force swing modifications. You’ll likely hit the ceiling with longer clubs or full swings. This compromises the accuracy of the Rapsodo MLM2Pro’s data collection. If possible, find a different room or space. If you’re limited to 8 feet, consider using shorter clubs or practicing specific swing techniques that work within the constraint.
How Do You Ensure Long-Term Success With Your Rapsodo MLM2Pro Indoor Setup?
Creating the right space is just the beginning. Long-term success depends on maintaining your setup and using it consistently. Keep your hitting area clean and organized. Regularly check camera positioning and lighting to ensure they haven’t shifted. The Rapsodo MLM2Pro is durable, but environmental factors affect performance over time. Dust your camera lens monthly and verify data accuracy with test shots periodically.
Your setup will evolve as you practice more. You might discover that certain adjustments improve your experience. Maybe you need brighter lighting, or perhaps repositioning your net helps with ball containment. Stay flexible and willing to refine your space. The goal is creating an environment where you practice consistently and improve your golf game. A well-designed Rapsodo MLM2Pro setup becomes a valuable asset in your golf improvement journey, providing accurate feedback and convenient practice opportunities year-round.
Remember that your space doesn’t need to be perfect to deliver results. Many successful home golf simulators operate in modest spaces with thoughtful planning and attention to detail. Start with the fundamentals—adequate room dimensions, proper lighting, and careful camera placement—then refine from there. Your investment in setup quality pays dividends through improved data accuracy and more enjoyable practice sessions.


Write Your Review
No reviews yet. Be the first to share your experience!