What Is a Budget Golf Simulator Enclosure DIY and Why Build One in 2026?
A budget golf simulator enclosure DIY is a cost-effective home setup that lets you practice golf indoors using affordable materials and basic tools. Building your own enclosure saves thousands compared to commercial options, typically costing between $200 and $500 for a functional space. In 2026, more golfers are investing in home simulators to improve their game year-round without expensive memberships. DIY enclosures combine a hitting bay, impact screen, and projector area into one compact room. You control the design, materials, and final cost. This approach works perfectly for garage conversions, spare rooms, or basement spaces.
The golf simulator market has exploded in recent years, with home setups becoming mainstream. Budget-conscious golfers no longer need to choose between quality and affordability. A well-built DIY enclosure provides accurate ball tracking and realistic swing analysis when paired with affordable launch monitors. Many enthusiasts complete their projects in a single weekend using readily available materials from hardware stores. The satisfaction of building your own space adds personal value beyond the financial savings.
Key Takeaway: A DIY golf simulator enclosure costs $200–$500 and delivers professional-quality practice space in your home.
What Materials Do You Need for a Budget Golf Simulator Enclosure?
Building a budget golf simulator enclosure requires specific materials that balance durability with cost. Your foundation starts with PVC pipe framing, which is lightweight, affordable, and easy to assemble without welding or advanced skills. The hitting bay needs protection from errant shots, so quality netting becomes essential. A projector screen captures ball flight data and displays your swing on a virtual course. Proper lighting ensures accurate ball tracking for launch monitors.
Here are the essential materials for your DIY enclosure:
- PVC pipe (1.5-inch diameter) for frame structure and joints
- Black netting or impact screen material rated for golf balls
- Projector screen (120-inch) for displaying swing data
- Foam padding or plywood backing for ball impact absorption
- LED lighting strips for consistent illumination
- Connectors and brackets to join PVC sections securely
- Weatherstripping or foam tape to seal gaps
- Basic tools: drill, saw, measuring tape, level
Quality netting is non-negotiable—cheap netting tears easily and compromises safety. Look for netting specifically designed for golf simulator bays, not general sports netting. Your projector screen should have a matte finish to reduce glare and provide accurate color reproduction for ball tracking. Foam padding behind the netting absorbs impact energy, protecting your frame and extending equipment lifespan.
Key Takeaway: Invest in quality netting and projector screens; cheap materials will fail quickly and waste your budget.
Where to Source Budget-Friendly Materials
Home Depot, Lowe’s, and Amazon offer competitive pricing on PVC materials and hardware supplies. Specialty golf simulator retailers sell pre-cut netting and impact screens at reasonable prices. Facebook Marketplace and Craigslist sometimes have used projector screens and netting from abandoned projects. Bulk purchases of PVC pipe often qualify for contractor discounts, even for DIY builders. Compare prices across retailers—shipping costs can significantly impact your total budget.
How Do You Build the Frame for Your DIY Enclosure?
The frame is your enclosure’s structural backbone. PVC pipe construction is ideal for budget builds because it requires no welding, special tools, or advanced carpentry skills. A typical frame measures 10 feet wide, 8 feet tall, and 8 feet deep, providing ample space for a full swing. Most builders complete the frame assembly in 4-6 hours using basic hand tools and a miter saw.
Follow these steps to build your PVC frame:
- Cut PVC pipe to length: verticals (96 inches), horizontals (120 inches), and depth supports (96 inches)
- Assemble the front frame first, connecting corners with 90-degree PVC elbows
- Build the rear frame using identical dimensions for structural consistency
- Connect front and rear frames with horizontal supports running the depth
- Add diagonal cross-bracing to prevent lateral movement and twisting
- Secure all connections with PVC cement or stainless steel brackets
- Use a level to ensure the frame is perfectly vertical and square
Diagonal bracing is critical for stability, especially if you plan to swing hard or install heavy equipment. Many DIYers skip this step and regret it later when frames shift during use. Test your frame’s rigidity by pushing hard on each side before installing netting. A wobbly frame will affect ball tracking accuracy and feel unstable during your swing.
Securing Your Frame to the Floor
Anchoring prevents the frame from shifting during aggressive swings. Drill holes through the bottom PVC feet into concrete or wood flooring. Use concrete anchors for garage floors or lag bolts for wooden subfloors. This prevents frame creep and maintains accurate launch monitor readings. Proper anchoring also improves safety, especially in households with children or pets.
Key Takeaway: A properly braced and anchored PVC frame provides stability for accurate ball tracking and safe practice.
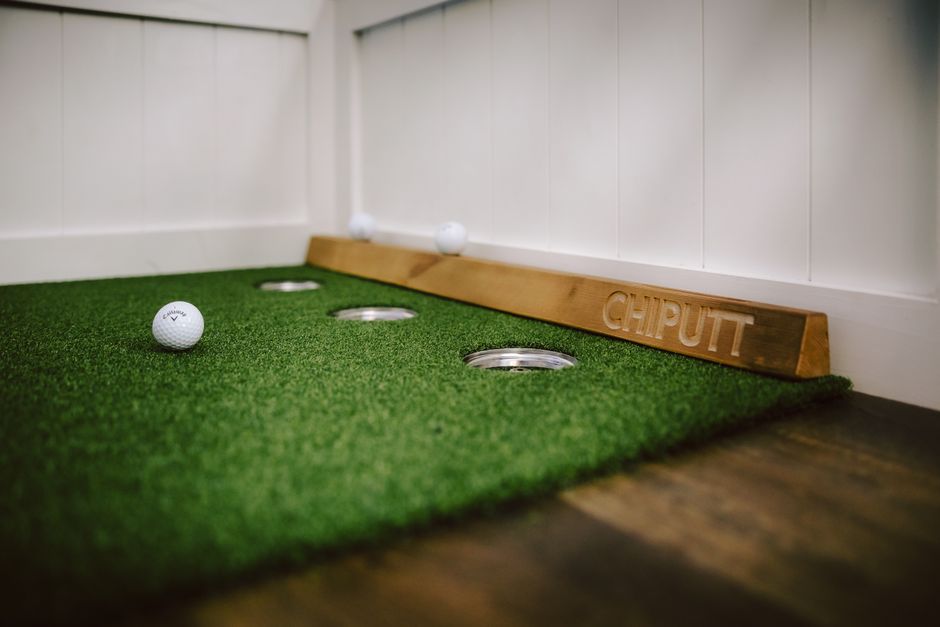
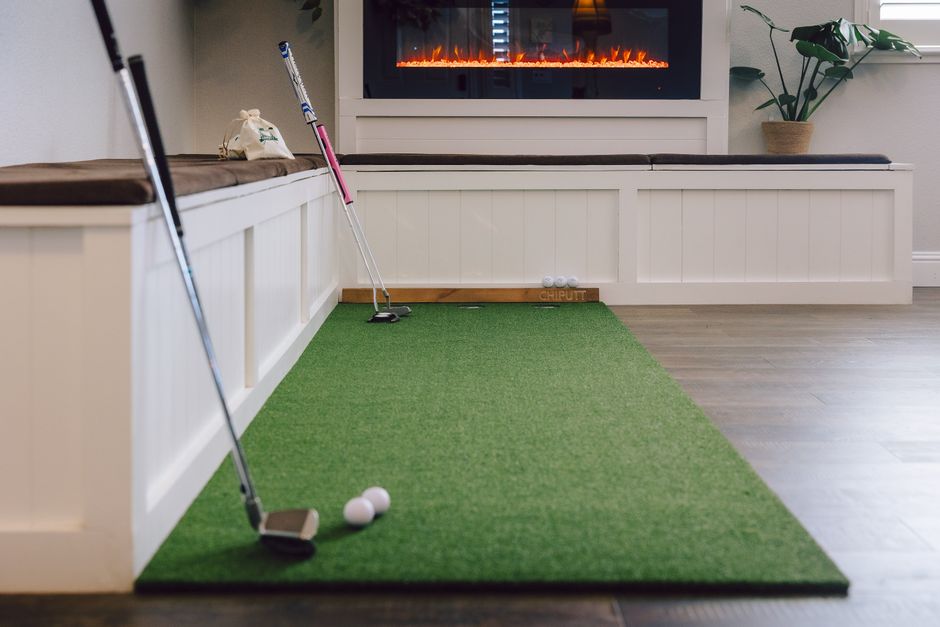
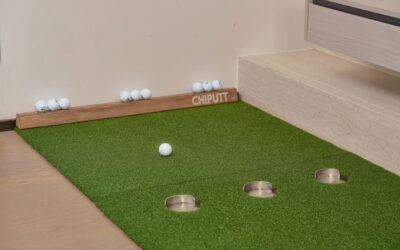
What’s the Best Way to Install Your Impact Screen and Netting?
The impact screen is where your launch monitor projects ball flight data and course visuals. Installation placement is critical—position it 10-12 feet from your hitting position to capture a full swing. The screen should be perpendicular to the ground and centered in your frame. Netting surrounds three sides of your bay to contain errant shots and protect walls and equipment.

Installation steps for your impact screen:
- Mount the projector screen frame to the rear of your PVC structure using brackets
- Stretch the screen material tightly and secure with clips or velcro strips
- Position the projector 10-14 feet behind the hitting position for optimal image size
- Adjust projector height and angle to center the image on the screen
- Install netting on the left, right, and top sides of the hitting bay
- Attach netting to the PVC frame using cable ties or velcro fasteners
- Ensure netting is taut and free of wrinkles that could interfere with ball flight
Loose netting creates dead zones where ball tracking fails. Tension the netting evenly across all attachment points. Leave the front open for your swing path—netting should start 2-3 feet behind the ball position. Test ball trajectory with a few practice shots before finalizing netting attachment.
Protecting Your Walls and Equipment
Even with netting, occasional shots escape. Add foam padding behind the netting to absorb impact and protect walls. Plywood backing provides additional protection and improves structural integrity. Install lighting fixtures outside the netting area to prevent ball damage. Cable management keeps wires organized and prevents tripping hazards during your swing.
Key Takeaway: Properly installed screens and taut netting ensure accurate ball tracking and equipment protection.
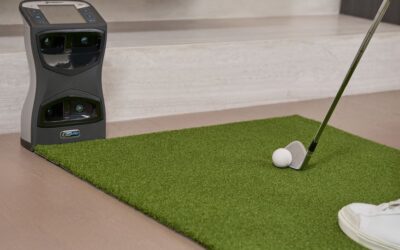
Which Launch Monitor Pairs Best With Your Budget Enclosure?
Your launch monitor is the technology backbone that transforms your enclosure into a functional golf simulator. Budget options in 2026 deliver impressive accuracy without premium pricing. The Shot Scope LM1 Launch Monitor offers excellent value for DIY builders, providing accurate ball data at an affordable price point. Alternatively, explore indoor versus outdoor launch monitors to understand which type suits your enclosure best.
Key features to prioritize in a budget launch monitor:
- Accurate ball speed and launch angle measurement within 2% margin
- Carry distance calculation for realistic course simulation
- Spin rate detection for short game practice
- Compatibility with popular golf software platforms
- Easy setup and calibration without professional assistance
- Reliable customer support and regular software updates
Budget launch monitors typically cost $300-$800, fitting comfortably within a $500 total enclosure budget if you source materials efficiently. The Uneekor Eye Mini Lite provides another affordable option with solid tracking performance. Avoid the cheapest options under $200—they lack accuracy and frustrate users quickly. Mid-range monitors deliver the best value for DIY builders focused on practice and improvement.
Key Takeaway: Pair your DIY enclosure with a mid-range launch monitor ($300–$800) for accurate, reliable ball tracking.
How Do You Optimize Lighting for Accurate Ball Tracking?
Lighting directly impacts launch monitor accuracy and overall practice experience. Inconsistent or dim lighting causes tracking errors and reduces software responsiveness. Professional enclosures use 3000-4000 lumens of LED lighting distributed evenly across the hitting area. Budget builders can achieve similar results using affordable LED strips and panels from hardware retailers.
Lighting setup recommendations:
- Install LED strips along the top frame to illuminate the hitting area uniformly
- Add side lighting to eliminate shadows on the ball and hitting surface
- Use 5000K color temperature LEDs for accurate color reproduction
- Install dimmer switches to adjust brightness for different times of day
- Position lights to avoid glare on the projector screen
- Use diffusers to soften harsh shadows and create even illumination
Avoid placing lights directly above the hitting area—they create shadows that confuse launch monitors. Instead, position lights at 45-degree angles from the sides and rear. Test your lighting setup with the launch monitor before finalizing installation. Some monitors provide feedback on lighting adequacy through their software interface.
Budget-Friendly Lighting Options
LED shop lights from home improvement stores cost $30-$50 and deliver excellent brightness. Adhesive-backed LED strips ($15-$25) work well for accent lighting and fill shadows. Smart bulbs allow remote dimming and scheduling, adding convenience without significant cost. Total lighting investment typically ranges from $100-$200 for a complete setup.
Key Takeaway: Invest $100–$200 in quality LED lighting to ensure consistent launch monitor accuracy.
What Software and Accessories Complete Your Budget Simulator Setup?
Software transforms your hardware into an engaging practice and entertainment platform. Many budget launch monitors include basic software packages, while others require separate purchases. The Full Swing Kit Tiger Woods 2026 offers comprehensive software integration for realistic course play and competitive modes. Explore options that match your practice goals and budget constraints.
Essential software and accessories for your enclosure:
- Launch monitor software (often included with your device purchase)
- Golf simulation platform (E6, TGC Tour, or similar subscription service)
- Projector and screen setup (calibration software for accurate display)
- Impact mat or hitting surface for consistent ball contact
- Ball collection net or basket for easy retrieval
- Wireless connectivity for software updates and data tracking
Most DIY builders use recycled golf balls in their enclosures, reducing costs further. Quality impact mats cost $150-$300 but last for years with proper maintenance. Budget alternatives include rubber gym matting or commercial turf, saving $100+ while maintaining functionality. Software subscriptions typically cost $10-$20 monthly for access to multiple courses and practice modes.
Key Takeaway: Complete your setup with affordable software subscriptions and recycled golf balls to minimize ongoing costs.
How Can You Maintain Your DIY Golf Simulator Enclosure?
Proper maintenance extends your enclosure’s lifespan and preserves equipment accuracy. Regular cleaning removes dust that interferes with launch monitor sensors. Netting inspection prevents tears that compromise ball containment. Frame stability checks ensure anchoring remains secure over time. Most maintenance tasks require only 30 minutes monthly and minimal cost.
Monthly maintenance checklist:
- Clean the projector screen with microfiber cloth to remove dust
- Inspect netting for tears or loose attachment points
- Check PVC frame connections for movement or loosening
- Clean launch monitor sensors with compressed air
- Test projector brightness and image alignment
- Verify all electrical connections remain secure and dry
Seasonal deep cleaning includes washing netting with mild soap and water, checking for UV damage, and inspecting caulking or seals. Replace netting when tears exceed 6 inches or multiple small holes appear. PVC frames rarely need replacement but may require re-tightening of connections annually. Document maintenance in a simple log to track when components need attention.
Key Takeaway: Monthly maintenance checks preserve accuracy and extend your enclosure’s lifespan significantly.
What Common Mistakes Should You Avoid When Building Your Enclosure?
Learning from others’ mistakes saves time, money, and frustration. Many DIY builders overlook critical details that impact performance and longevity. Understanding these pitfalls helps you build a superior enclosure on your first attempt. The most successful projects prioritize stability, lighting, and netting quality above all other factors.
Common mistakes to avoid:
- Skipping diagonal frame bracing, causing structural instability and tracking errors
- Using cheap netting that tears immediately under normal use
- Inadequate lighting that reduces launch monitor accuracy and user experience
- Poor screen positioning that limits swing freedom or creates tracking blind spots
- Failing to anchor the frame to flooring, allowing creep and misalignment
- Undersizing the hitting area, restricting full swing mechanics and comfort
- Neglecting cable management, creating tripping hazards and equipment damage risks
Budget constraints tempt builders to cut corners on quality materials. Resist this urge—cheap netting and inadequate lighting create frustration that no amount of savings justifies. Invest your budget strategically: prioritize frame stability, netting quality, and launch monitor accuracy. Cheaper components can be upgraded later without major reconstruction.
Key Takeaway: Avoid frame instability and cheap netting; these mistakes compromise accuracy and durability.
How Much Will Your Complete Budget Golf Simulator Enclosure Cost in 2026?
A complete budget golf simulator enclosure in 2026 costs between $400 and $800, depending on material sourcing and component choices. Breaking down typical expenses reveals where your money goes and where you can find savings. Transparent budgeting helps you make informed decisions and avoid unexpected costs during construction.
Typical cost breakdown for a budget enclosure:
- PVC frame materials and connectors: $80–$120
- Netting and impact screen: $100–$150
- Projector and screen: $200–$300
- Launch monitor: $300–$600 (varies by model)
- Lighting and electrical: $100–$150
- Miscellaneous (tools, fasteners, padding): $50–$100
Many DIY builders save money by using existing equipment—a spare projector from home theater setup or recycled golf balls from a local range. Negotiating bulk PVC purchases at home improvement stores often yields 10-15% discounts. Shopping sales and waiting for seasonal promotions can reduce total costs by $100-$200. Used launch monitors from marketplace platforms occasionally offer savings, though warranty coverage may be limited.
Your total investment creates a space that would cost $3,000-$5,000 commercially. The ROI becomes apparent after 12-24 months of regular use, especially if you eliminate expensive range visits or golf lessons. Many enthusiasts view their DIY enclosure as a long-term investment in their golf game and home value.
Key Takeaway: Budget $400–$800 for a complete DIY enclosure, creating professional-quality practice space at a fraction of commercial costs.
Can Your Budget Enclosure Support Competitive Play and Data Tracking?
Modern budget enclosures support competitive play modes and detailed performance tracking. Launch monitors capture swing data that software platforms analyze for improvement insights. Many systems track ball flight patterns, club metrics, and course performance statistics. This data transforms your practice space into a comprehensive golf improvement tool, not just entertainment.
Data tracking capabilities in budget simulators:
- Ball speed and carry distance measurement for every shot
- Launch angle and spin rate analysis for shot optimization
- Handicap calculation based on simulated course play
- Head-to-head competitive modes for family and friends
- Practice drill libraries targeting specific skill areas
- Historical data storage for progress tracking over months and years
Popular software platforms like E6, TGC Tour, and manufacturer-specific applications integrate seamlessly with budget launch monitors. Most platforms offer free basic versions with paid subscriptions unlocking premium courses and features. Competitive modes add engagement and motivation beyond solo practice. Data visualization helps you identify swing patterns and track improvement objectively.
Key Takeaway: Budget enclosures support competitive play and comprehensive data tracking for serious practice and improvement.
How Does Your DIY Enclosure Compare to Commercial Simulator Installations?
Commercial golf simulators cost $5,000-$15,000 installed, featuring professional-grade components and expert installation. Your DIY enclosure sacrifices some polish and convenience for dramatic cost savings. However, functionality gaps between budget DIY and premium commercial systems have narrowed significantly in 2026. Many serious golfers find their DIY setups deliver 85-90% of commercial performance at 10-15% of the cost.
Comparison of DIY versus commercial installations:
- Cost: DIY $400–$800 versus Commercial $5,000–$15,000
- Installation: DIY weekend project versus Commercial professional installation
- Customization: DIY fully customizable versus Commercial limited options
- Accuracy: DIY 95%+ versus Commercial 98%+ (minimal practical difference)
- Software: DIY same platforms available versus Commercial proprietary systems
- Maintenance: DIY user-performed versus Commercial professional service
- Scalability: DIY easily upgradeable versus Commercial fixed configuration
Your DIY enclosure offers advantages commercial systems can’t match: complete customization, upgradeable components, and learning value from the building process. You understand every system intimately, troubleshooting problems independently. Commercial installations provide turnkey convenience and professional aesthetics, valuable for golf academies or commercial facilities. For home use, DIY delivers superior value and flexibility.
Key Takeaway: DIY enclosures deliver 85-90% of commercial performance at 5-10% of the cost, making them ideal for home golfers.
What Are the Best Practices for Optimizing Your DIY Enclosure Performance?
Optimization transforms your basic enclosure into a high-performance practice facility. Simple adjustments to positioning, lighting, and calibration dramatically improve accuracy and user experience. Many builders overlook these refinements, leaving performance potential untapped. Investing time in optimization yields returns throughout your enclosure’s lifespan.
Performance optimization checklist:
- Calibrate launch monitor sensors according to manufacturer specifications
- Position the hitting mat precisely at recommended distance from sensors
- Adjust projector focus and keystone correction for sharp image display
- Optimize lighting angles to eliminate shadows on ball and hitting surface
- Verify screen tension and alignment for accurate ball tracking zones
- Test software settings for your specific launch monitor and courses
- Conduct baseline accuracy testing with known shot data
Baseline testing involves hitting shots with known characteristics and comparing software readings to actual results. Small discrepancies (2-3%) are normal and acceptable. Larger variations indicate calibration issues requiring adjustment. Document your testing results for future reference. Many enthusiasts perform seasonal recalibration to maintain peak accuracy.
Advanced Optimization Techniques
Advanced users experiment with hitting mat materials, lighting color temperatures, and sensor positioning to squeeze additional accuracy from their systems. Some builders add ambient sound systems for immersive course experience. Others install secondary cameras for swing analysis alongside ball tracking. These enhancements typically cost $200-$500 but significantly improve the overall experience.
Key Takeaway: Careful calibration and optimization unlock your enclosure’s full performance potential.
How Can You Upgrade Your Budget Enclosure Over Time?
Your DIY enclosure doesn’t need to be perfect on day one. Strategic planning allows gradual upgrades as budget and priorities evolve. Starting with essential components and upgrading incrementally reduces initial investment while building toward a premium system. This approach appeals to budget-conscious builders who want flexibility and long-term value.
Logical upgrade path for your enclosure:
- Phase 1: Basic frame, netting, and budget launch monitor ($400–$500)
- Phase 2: Upgrade to premium launch monitor ($300–$400 additional)
- Phase 3: Install 4K projector and larger screen ($300–$500 additional)
- Phase 4: Add swing analysis camera and audio system ($200–$400 additional)
- Phase 5: Upgrade to premium software and advanced tracking ($100–$200 additional)
Plan your upgrades strategically based on which improvements will most enhance your practice experience. Most builders prioritize launch monitor accuracy first, as this directly impacts data quality. Screen and projector upgrades follow, improving visual feedback and engagement. Swing analysis cameras and audio systems add polish and entertainment value later. This phased approach spreads costs while maintaining functionality throughout.
Key Takeaway: Plan upgrades strategically to evolve your basic enclosure into a premium system over 2-3 years.
What Frequently Asked Questions Do Budget Enclosure Builders Have?
Can I build a golf simulator enclosure in my apartment or condo?
Yes, but with limitations. Apartments typically have space constraints and noise concerns. A compact 8×8-foot setup fits many spare bedrooms or bonus rooms. Soundproofing with foam panels ($200-$400) reduces noise from impact and projector cooling. Check lease terms regarding modifications before building. Portable PVC frames allow disassembly if you move.
How accurate are budget launch monitors compared to premium models?
Budget monitors ($300-$600) achieve 95%+ accuracy, within acceptable margins for practice and improvement. Premium models ($1,000+) offer 98%+ accuracy and additional metrics. For most home golfers, the accuracy difference is negligible and doesn’t justify premium pricing. Professional instruction and software quality matter more than sensor precision for skill development.
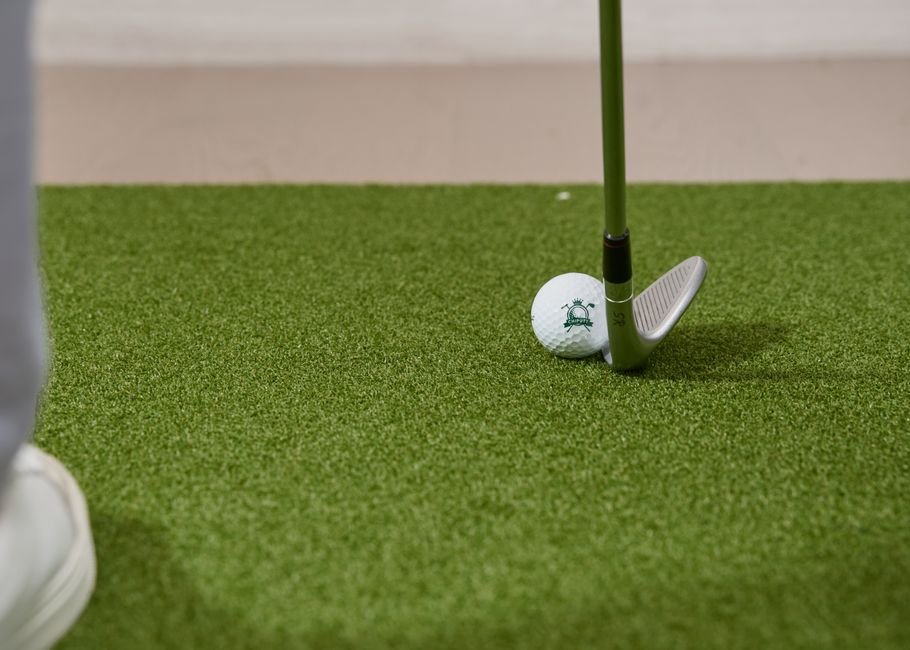
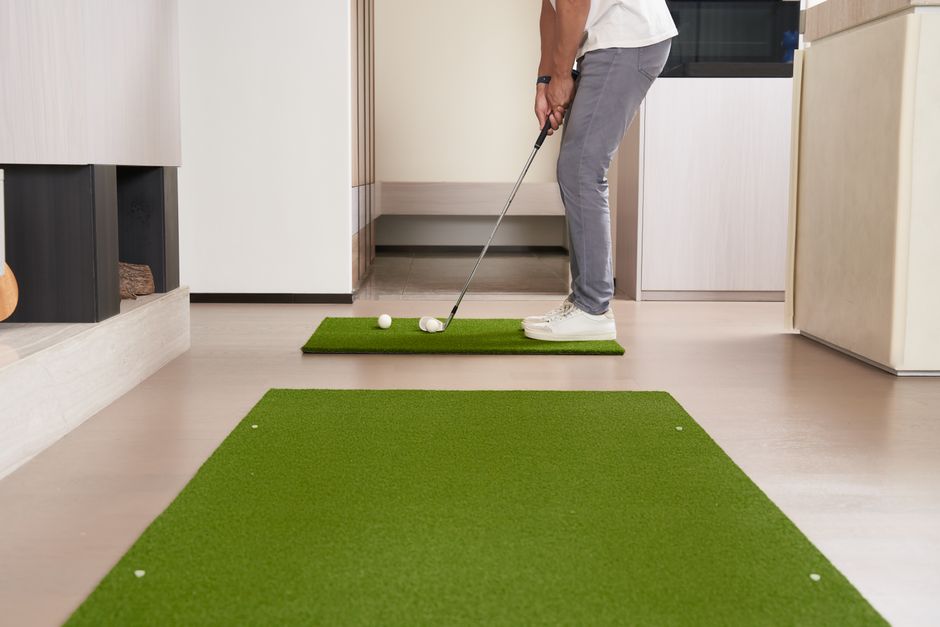
What’s the best hitting surface for my DIY enclosure?
Premium golf mats ($150-$300) provide realistic feel and durability. Commercial turf ($50-$100) offers budget-friendly alternatives with acceptable performance. Rubber gym matting ($30-$50) works adequately for practice but feels less authentic. Most builders prefer premium mats for comfort during extended practice sessions. Quality hitting surfaces reduce joint stress and encourage consistent mechanics.
Do I need planning permission or permits to build an enclosure?
Most residential DIY enclosures don’t require permits since they’re temporary structures using existing electrical. Check local building codes for permanent installations. Basement or garage conversions typically fall outside permit requirements. Consult your local building department if unsure. Professional installations often require permits and inspections.
Can I use my smartphone or tablet as a launch monitor?
Smartphone-based systems exist but offer limited accuracy compared to dedicated launch monitors. Apps like Golfshot and Arccos provide handicap tracking but not ball flight measurement. For serious practice and improvement, dedicated launch monitors deliver superior data quality. Budget models ($300-$600) outperform smartphone systems significantly.
How long does it take to build a complete DIY enclosure?
Most builders complete frame construction in 8-12 hours over one weekend. Adding netting, screens, and electrical takes another 4-8 hours. Full setup including calibration and testing requires 16-24 hours total. Experienced builders finish faster. Planning and material gathering add 1-2 weeks before construction begins.
Should You Build Your Budget Golf Simulator Enclosure in 2026?
Building a budget golf simulator enclosure in 2026 represents an excellent investment in your golf game and home value. The combination of affordable technology, quality materials, and proven DIY methods makes this project accessible to any motivated golfer. Your $400-$800 investment creates a practice facility worth $3,000-$5,000 commercially, with complete customization and control over your experience.
The technology landscape in 2026 offers unprecedented value for budget builders. Launch monitors have matured into reliable, accurate devices at mid-range prices. Software platforms provide competitive play, detailed analytics, and course variety matching premium systems. DIY construction methods have been refined through thousands of successful projects, reducing risk and complexity. Your enclosure can support serious practice, casual entertainment, and competitive play simultaneously.
Start with essential components and upgrade strategically as your budget allows. Prioritize frame stability, netting quality, and launch monitor accuracy—these fundamentals determine your system’s long-term success. Avoid cheap shortcuts on critical components; they compound frustration and waste money. With proper planning and execution, your DIY enclosure will deliver years of reliable performance and enjoyment. The combination of cost savings, customization, and personal satisfaction makes building your own golf simulator enclosure a compelling choice for 2026.
Key Takeaway: Build your budget golf simulator enclosure in 2026 to create a professional-quality practice facility at a fraction of commercial costs.


Write Your Review
No reviews yet. Be the first to share your experience!