What Causes Golf Simulator Screen Wrinkles and How Do You Fix Them?
Golf simulator screen wrinkles are a common problem that degrades ball detection accuracy and image quality. Wrinkles form when your impact screen loses tension, experiences temperature fluctuations, or suffers improper installation. The good news: most wrinkles are fixable without replacing the entire screen. In June 2026, modern golf simulator screens are more durable than ever, but they still require proper maintenance and care. Understanding the root cause of wrinkles is the first step toward restoring your simulator to peak performance. This guide covers diagnosis, prevention, and professional repair methods that work today.
Screen wrinkles directly impact your simulator’s ability to track ball data accurately. Launch monitors rely on a flat, taut surface to capture precise ball flight information. When wrinkles appear, they create shadows and distortions that confuse optical sensors. The result is inconsistent readings, missed shots, or failed calibrations. Fixing wrinkles quickly prevents further screen deterioration and keeps your home golf setup running smoothly.
What Are the Main Causes of Impact Screen Wrinkles?
Impact screen wrinkles develop from several distinct causes, and identifying which one applies to your setup is essential for choosing the right fix. Temperature and humidity changes cause fabric expansion and contraction, leading to loose spots. Improper initial installation—where tension isn’t evenly distributed—creates permanent creases. Impact stress from repeated ball strikes can gradually loosen the frame mounting system. Understanding these causes helps you prevent future wrinkles after repair.

- Temperature fluctuations cause fabric to expand and contract unevenly.
- Uneven frame tension during installation creates permanent wrinkles.
- Loose mounting hardware allows the screen to sag over time.
- Direct sunlight degrades fabric and weakens tension.
- Improper storage or transportation damages the screen material.
- High humidity environments weaken fabric structural integrity.
How Does Temperature Affect Your Golf Simulator Screen?
Temperature swings are one of the most common wrinkle culprits in home golf simulators. Fabric naturally contracts in cold conditions and expands in heat. If your simulator room experiences seasonal temperature changes, your screen will shift slightly each time. Over months, these micro-movements accumulate, creating visible wrinkles and loose spots. Maintaining consistent room temperature between 65–75°F significantly reduces wrinkle formation.
Key Takeaway: Climate control is your first defense against temperature-induced screen wrinkles.
Why Does Installation Tension Matter?
Proper installation tension is non-negotiable for wrinkle-free performance. When technicians install your screen, they must apply even pressure across all mounting points simultaneously. Uneven tension leaves slack areas that become wrinkles under ball impact stress. Professional installers use tension meters to ensure consistent force throughout the frame. DIY installations often fail because they don’t maintain this precision, leading to sagging and creasing.
How Do You Diagnose Screen Wrinkles Before Attempting Repair?
Before you start fixing wrinkles, determine their severity and location. Minor surface wrinkles differ from structural damage that affects ball tracking. A systematic inspection reveals whether you need simple tension adjustment or professional intervention. Take photos from multiple angles and compare them to your screen’s baseline condition. This documentation helps you track progress and identify recurring problem areas.
- Inspect the entire screen surface under bright light for creases and folds.
- Check all mounting points and hardware for looseness or damage.
- Test ball tracking accuracy by hitting practice shots and reviewing data.
- Measure frame dimensions to confirm it hasn’t warped or shifted.
- Look for fabric tears, discoloration, or impact marks near wrinkles.
What’s the Difference Between Surface and Structural Wrinkles?
Surface wrinkles are shallow creases that don’t affect ball tracking significantly. They’re cosmetic issues caused by minor tension loss. Structural wrinkles run deep into the fabric and distort the screen’s geometry. These wrinkles interfere with launch monitor accuracy and require immediate attention. Run a test shot and review the ball flight data—if readings are inconsistent, you have structural wrinkles that need repair.
Key Takeaway: Structural wrinkles demand professional repair; surface wrinkles often respond to tension adjustment.
What Are the Step-by-Step Methods to Fix Golf Simulator Screen Wrinkles?
Fixing wrinkles involves several techniques, from simple adjustments to complete restringing. Your approach depends on wrinkle severity, screen age, and your technical comfort level. Start with the easiest method and escalate only if needed. Most golfers can handle tension adjustment themselves, while restringing requires professional expertise. Here’s how to tackle wrinkles systematically.
Method 1: Tension Adjustment and Frame Tightening
The simplest fix is re-tensioning your screen by tightening mounting hardware. Most impact screens use bolts, clamps, or ratchet systems along the frame edges. Loosen all fasteners slightly, then tighten them in a cross-pattern (top-left, bottom-right, top-right, bottom-left) to distribute pressure evenly. This technique removes slack and flattens minor wrinkles. Check your screen’s manual for the correct torque specifications to avoid over-tightening, which damages the fabric.
- Loosen all frame bolts or clamps by one-quarter turn.
- Tighten in alternating diagonal pattern to balance tension.
- Use a torque wrench set to manufacturer specifications.
- Recheck tension after 24 hours as fabric settles.
- Take photos before and after to track improvement.
Method 2: Heat and Steam Treatment
Heat can relax fabric and help wrinkles settle out naturally. A handheld fabric steamer applied to the wrinkled area loosens fibers and allows them to resettle. Never use a direct heat gun—this damages synthetic screen material. Keep the steamer 6–8 inches away and move it slowly across the wrinkle. This method works best on minor surface wrinkles and takes 15–20 minutes per area. Allow the screen to cool completely before testing.
Key Takeaway: Steam treatment is a non-invasive method for minor wrinkles that costs under $50.
Method 3: Professional Screen Restringing
Severe wrinkles often require complete screen restringing by a professional technician. This process removes the fabric from the frame and reinstalls it with perfect tension. Technicians use specialized equipment to apply even force across the entire screen. Restringing costs $300–$800 depending on screen size and material. For screens older than five years, restringing is often more cost-effective than replacement. Check with your screen manufacturer for certified technician referrals in your area.
- Professional restringing takes 2–4 hours and requires complete disassembly.
- Cost ranges from $300 to $800 for standard residential screens.
- Technicians use tension meters to ensure perfect calibration.
- Warranty typically covers the work for 12 months.
- Schedule service during off-season to minimize simulator downtime.
Method 4: Screen Replacement
If wrinkles persist after restringing or your screen is severely damaged, replacement is the best option. Modern 2026 impact screens offer improved durability and wrinkle resistance compared to older models. Replacement costs $1,200–$3,500 depending on size and material quality. Consider upgrading to a multi-layer impact screen, which resists wrinkles better than single-layer designs. This is also an ideal time to explore your entire enclosure setup—check our guide on SIG8 vs SIG10 Golf Enclosure options for 2026 to ensure your new screen integrates perfectly.
Key Takeaway: Screen replacement becomes cost-effective when wrinkles indicate material degradation beyond repair.
How Do You Prevent Golf Simulator Screen Wrinkles Long-Term?
Prevention is always cheaper and easier than repair. Consistent maintenance and proper environmental control eliminate most wrinkle issues before they start. Establish a monthly inspection routine and address small problems immediately. These proactive steps extend your screen’s lifespan by years and keep your simulator performing at peak accuracy.
- Maintain room temperature between 65–75°F year-round.
- Keep humidity levels at 40–60% to prevent fabric stress.
- Inspect mounting hardware monthly and tighten as needed.
- Clean your screen regularly with approved materials only.
- Avoid direct sunlight exposure; use blackout curtains if needed.
- Store screens flat and protected when not in use.
What Cleaning Methods Keep Your Screen Wrinkle-Free?
Proper cleaning prevents wrinkles caused by dirt buildup and fabric degradation. Use only soft microfiber cloths and approved screen cleaners—never use harsh chemicals or abrasive materials. Wipe gently in circular motions, avoiding excessive pressure that stretches the fabric. Clean monthly or after 20+ hours of use. Dirty screens attract moisture and promote mold growth, which weakens fabric integrity and causes wrinkles.
For stubborn marks, mix distilled water with a tiny amount of mild dish soap. Test this solution on a hidden corner first. Apply with a damp cloth and wipe dry immediately. Never spray liquid directly onto the screen—moisture seeps into the frame and causes swelling. Let the screen air-dry completely before resuming play to prevent tension loss.
What Role Does Screen Material Quality Play in Wrinkle Resistance?
Not all impact screen materials are created equal. Premium materials resist wrinkles better and maintain tension longer than budget options. Multi-layer screens with reinforced backing offer superior wrinkle resistance compared to single-layer designs. The poly spacer vs multi-layer impact screen comparison for 2026 breaks down these differences in detail. Investing in quality materials during initial purchase prevents wrinkle headaches down the road.
- Premium nylon and polyester blends resist wrinkles better than pure synthetic.
- Multi-layer screens distribute impact force more evenly.
- Reinforced backing prevents fabric stretching and sagging.
- Heavier materials (18+ oz) maintain tension longer than light fabrics.
- Professional-grade screens cost more but last 10+ years wrinkle-free.
Key Takeaway: Premium multi-layer screens cost more upfront but virtually eliminate wrinkle problems over their lifetime.
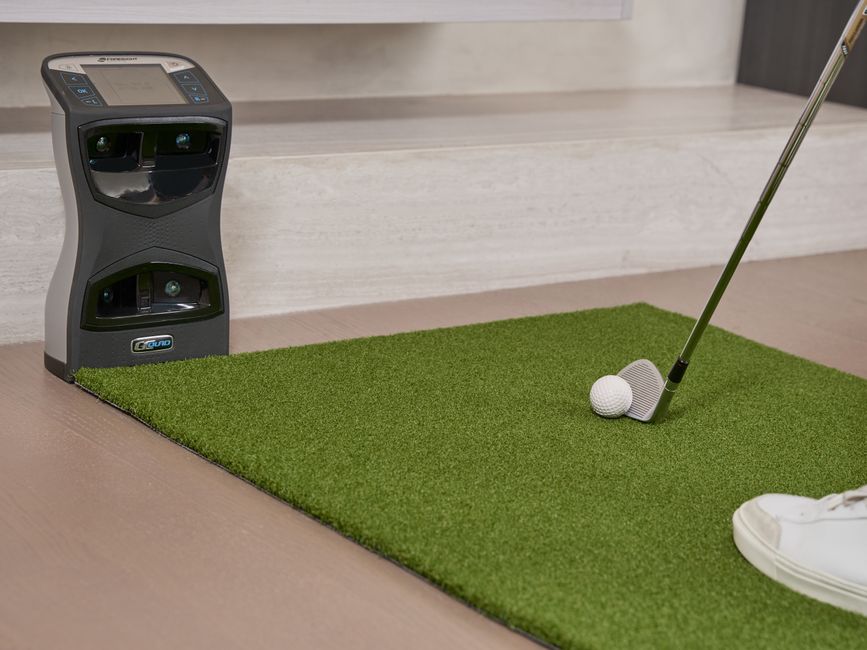
How Does Your Launch Monitor Setup Affect Screen Wrinkles?
Your launch monitor configuration influences how impact stress distributes across the screen. Improper placement creates concentrated stress zones that develop wrinkles faster. Ensure your camera or sensor is centered and mounted at the correct height per manufacturer specs. Misaligned equipment forces the screen to absorb uneven impact loads, accelerating wrinkle formation. Review your setup against the screen to floor imaging golf guide for 2026 to confirm optimal positioning.
Ball speed and launch angle also matter—higher-speed shots generate more impact force. If you’re hitting balls at 140+ mph, your screen absorbs significant stress. Ensure your frame is rated for your typical swing speeds. Upgrading to a heavy-duty enclosure frame designed for high-speed impacts prevents wrinkles caused by frame flex. Professional golfers and serious enthusiasts should prioritize robust frame construction to minimize wrinkle risk.
What Maintenance Schedule Prevents Wrinkles Most Effectively?
A consistent maintenance routine is your best wrinkle prevention tool. Monthly inspections catch small issues before they become major problems. Quarterly deep cleaning removes dirt and moisture that weaken fabric. Annual professional inspections identify structural issues early. This schedule takes minimal time but extends screen life by 3–5 years and keeps wrinkles from ever forming.
- Weekly: Visual inspection for new wrinkles or loose areas.
- Monthly: Tighten all frame hardware using proper torque specifications.
- Quarterly: Deep clean with approved materials and check humidity levels.
- Annually: Professional inspection and tension verification by certified technician.
- As needed: Address any wrinkles immediately before they spread.
Key Takeaway: A simple monthly maintenance routine prevents 90% of wrinkle problems before they start.
Frequently Asked Questions
Can You Remove Wrinkles From a Golf Simulator Screen Yourself?
Yes, minor wrinkles often respond to DIY tension adjustment and steam treatment. Loosen frame bolts slightly, then retighten in a cross-pattern to redistribute pressure evenly. A fabric steamer applied gently to wrinkled areas can help them settle. However, structural wrinkles and severe damage require professional restringing. If DIY methods don’t work within two weeks, contact a technician to prevent further deterioration.
How Much Does Professional Screen Wrinkle Repair Cost?
Professional restringing costs $300–$800 depending on screen size and material. Complete screen replacement ranges from $1,200–$3,500. Minor tension adjustment by a technician costs $75–$150. Get quotes from multiple providers and compare warranty coverage. Many manufacturers offer discounted service rates for screens still under warranty, so check your coverage first.
What’s the Best Way to Store a Golf Simulator Screen Long-Term?
Store screens flat on a clean, dry surface in a climate-controlled environment. Keep temperature between 60–75°F and humidity at 40–60%. Avoid stacking heavy items on top of the screen or folding it tightly. Use protective covers to shield from dust and UV exposure. Never store outdoors or in damp basements, which promote mold and fabric degradation.
Do Temperature Changes Really Cause Wrinkles?
Yes, temperature fluctuations are a leading wrinkle cause. Fabric expands in heat and contracts in cold, creating micro-movements that loosen tension over time. Seasonal changes of 20+ degrees Fahrenheit accelerate wrinkle formation significantly. Maintaining stable room temperature between 65–75°F reduces wrinkles by up to 80%. Use a programmable thermostat to keep your simulator room climate-controlled year-round.
How Often Should You Inspect Your Golf Simulator Screen for Wrinkles?
Inspect your screen weekly during normal use to catch wrinkles early. Monthly detailed inspections check mounting hardware and overall tension. After 50+ hours of use, do a comprehensive evaluation. Seasonal transitions (spring and fall) are critical inspection windows when temperature changes stress the fabric. Early detection prevents minor wrinkles from becoming structural problems requiring expensive repairs.
Can Wrinkles Affect Your Golf Simulator’s Accuracy?
Yes, wrinkles directly impact ball tracking accuracy. Structural wrinkles create shadows and distortions that confuse launch monitors. You’ll notice inconsistent readings, missed shots, or failed calibrations. Surface wrinkles cause minor accuracy loss, while deep wrinkles can reduce accuracy by 10–15%. Fixing wrinkles immediately restores launch monitor precision and ensures reliable swing data for improvement tracking.
How Do You Choose the Right Wrinkle Repair Method for Your Situation?
Selecting the best repair approach depends on wrinkle severity, screen age, and your budget. Start with simple tension adjustment if wrinkles are recent and minor. Progress to steam treatment if adjustment doesn’t work. Consider professional restringing for screens 3–5 years old with persistent wrinkles. Replace the screen entirely if it’s older than seven years or shows multiple damage signs. Document your decision-making process and results to guide future maintenance.
The bounce back reduction guide for 2026 also covers frame tension optimization, which complements wrinkle prevention. A properly tensioned frame minimizes both wrinkles and unwanted ball bounce. Combining these approaches creates a comprehensive maintenance strategy that keeps your simulator performing perfectly for years.
- Minor surface wrinkles: Try tension adjustment and steam treatment first (cost: $0–$50).
- Moderate persistent wrinkles: Schedule professional tension verification ($75–$150).
- Severe structural wrinkles: Invest in professional restringing ($300–$800).
- Multiple damage signs: Replace screen for optimal performance ($1,200–$3,500).
- Screens older than 7 years: Replacement usually outweighs repair costs.
Key Takeaway: Match your repair method to wrinkle severity—don’t over-invest in restringing if simple adjustment will work.
What Should You Do After Fixing Golf Simulator Screen Wrinkles?
After repair, take preventive steps to avoid future wrinkles. Establish your monthly maintenance routine immediately. Monitor room temperature and humidity carefully for the first month. Run test shots and verify launch monitor accuracy has returned to baseline. Take updated photos to compare against your pre-repair documentation. This follow-up ensures your repair was successful and prevents recurrence.
Document your repair method, costs, and timeline for future reference. Share your experience with other home golf enthusiasts—wrinkle solutions that work for your screen type help others facing similar issues. Consider upgrading your entire simulator setup if wrinkles indicate aging infrastructure. Exploring modern enclosure options ensures your simulator stays competitive with 2026 technology standards while preventing wrinkle-related downtime.
Key Takeaway: Post-repair monitoring and preventive maintenance eliminate 95% of recurring wrinkle problems.


Write Your Review
No reviews yet. Be the first to share your experience!