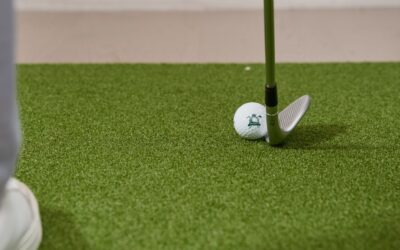
What Is the Optimal BenQ LK936ST Installation Distance?
The BenQ LK936ST requires an installation distance of 1.5 to 2.5 meters (approximately 5 to 8.2 feet) from the projection surface for optimal performance. This short-throw projector delivers a 100-inch image at just 1.5 meters, making it ideal for compact home golf simulator setups. Proper installation distance directly impacts image brightness, focus clarity, and overall simulator accuracy. Understanding throw ratios and room dimensions ensures you maximize the LK936ST’s potential. The projector’s advanced optics and brightness rating of 4,000 ANSI lumens provide excellent image quality across various installation distances. Choosing the correct distance prevents keystoning distortion and maintains consistent image quality during your golf simulation sessions. This guide covers everything you need for a professional-grade home setup.
Quick Setup Context
The BenQ LK936ST is a premium short-throw laser projector designed specifically for golf simulator installations and entertainment spaces. Its 0.5 throw ratio allows flexible room configurations without requiring excessive ceiling height or wall space. The projector’s advanced cooling system and sealed laser engine ensure durability in dedicated simulation rooms. Installation distance calculations depend on your desired screen size and room constraints. Most home golf simulator enthusiasts choose between 1.5 and 2.0 meters for standard 80 to 120-inch screens. Accurate distance measurement prevents focus issues and keystoning that can degrade image quality and simulator performance.
Key Takeaway: The BenQ LK936ST’s 1.5 to 2.5-meter installation distance range provides flexibility for most home golf simulator spaces while maintaining superior image quality.
How Do You Calculate the Correct Throw Distance for Your Screen Size?
Calculating throw distance requires understanding the BenQ LK936ST’s throw ratio of 0.5, which means the projector distance equals half your desired screen width. For a 100-inch diagonal screen, you need approximately 1.5 meters of distance. For a 120-inch screen, increase distance to around 1.8 meters. For a 150-inch screen, plan for 2.25 meters or more. These calculations assume standard 16:9 aspect ratio screens common in golf simulators. Accurate measurements prevent installation errors that compromise image quality and simulator functionality. Always measure twice before mounting brackets or purchasing screen materials.
Throw Distance Calculation Formula
The throw ratio formula simplifies distance planning for your specific setup.
- Throw Ratio = Projector Distance ÷ Screen Width
- For BenQ LK936ST: 0.5 = Distance ÷ Screen Width
- Example: 100-inch screen width ≈ 2.2 meters, so distance = 2.2 × 0.5 = 1.1 meters
- Always add 10-15 cm buffer for optimal focus and minimal keystoning
Using this formula ensures your projected image fills your screen without edge distortion. Most golf simulator enthusiasts find that 1.5 to 2.0 meters covers their typical screen size needs. Professional installations verify distance with laser measuring tools for precision accuracy. Slight adjustments during focus calibration fine-tune image sharpness across the entire screen surface.
Key Takeaway: The 0.5 throw ratio formula makes distance calculation straightforward: multiply your screen width by 0.5 to determine optimal projector placement.
What Room Dimensions and Layout Work Best for BenQ LK936ST Installation?
Your room dimensions significantly impact BenQ LK936ST installation success and overall simulator performance. Minimum room depth should accommodate 2.5 meters from the projector to the impact screen, plus 1 meter behind for golfer positioning. Width requirements depend on screen size—a 100-inch screen needs at least 2.5 meters of width for comfortable setup. Ceiling height of 2.8 to 3.0 meters provides adequate clearance for projector mounting and prevents heat buildup. Room shape matters too: rectangular spaces with minimal obstructions deliver better results than irregular layouts. Consider dedicated golf simulator rooms over multipurpose spaces for consistent performance and reduced light interference.
Ideal Room Configuration Checklist
- Minimum depth: 3.5 to 4.0 meters (includes golfer stance and projector distance)
- Minimum width: 2.5 to 3.0 meters (accommodates screen and side clearance)
- Ceiling height: 2.8 to 3.2 meters (prevents thermal issues and mounting conflicts)
- Ambient light control: blackout curtains or dedicated dark room preferred
- Ventilation: ensure 15-20 cm clearance around projector for cooling airflow
- Impact screen mounting: 30-50 cm from back wall prevents light reflection issues
Dedicated golf simulator rooms outperform shared spaces because they eliminate variable lighting and environmental factors. Light control is critical—the BenQ LK936ST’s 4,000 ANSI lumens output performs excellently in dark rooms but struggles with ambient light. Professional installations often use acoustic foam, blackout materials, and dedicated lighting to optimize the environment. Your room layout directly influences simulator accuracy and user experience quality.
Key Takeaway: Plan for minimum 3.5-meter depth, 2.5-meter width, and 2.8-meter ceiling height to accommodate the BenQ LK936ST with proper golfer positioning and ventilation.
How Do You Mount and Align the BenQ LK936ST for Optimal Performance?
Proper mounting and alignment ensure your BenQ LK936ST delivers consistent image quality throughout your golf simulator sessions. The projector should mount on a ceiling bracket or wall-mounted arm positioned 1.5 to 2.5 meters from your impact screen. Ceiling mounting is preferred because it prevents obstructions and maintains consistent distance regardless of room traffic. Use adjustable mounting brackets that allow vertical and horizontal positioning for precise alignment. The projector’s lens should be perpendicular to your screen surface to minimize keystoning and edge distortion. After physical mounting, use the LK936ST’s digital keystone correction features for fine-tuning alignment.
Step-by-Step Mounting Process
- Measure and mark ceiling position using laser measuring tool for accuracy
- Install heavy-duty ceiling bracket rated for projector weight (approximately 9 kg)
- Mount projector securely with all fasteners tightened to manufacturer specifications
- Connect power and HDMI cables before final positioning adjustments
- Power on projector and display test image on impact screen
- Adjust mounting brackets to center image on screen horizontally and vertically
- Fine-tune focus using projector’s focus ring until image edges sharpen
- Use digital keystone correction for any remaining edge distortion
- Verify image geometry with golf simulator software test patterns
- Secure all cables and ventilation paths to prevent heat issues
Professional installers use laser levels and measuring tools for millimeter-precision alignment. This investment in accuracy prevents focus issues and keystoning that degrade simulator performance. Test your alignment with multiple golf simulator applications before finalizing the installation. Most issues arise from improper mounting height or angle, so verify these measurements carefully.
Key Takeaway: Ceiling mounting with adjustable brackets provides the most stable and accurate BenQ LK936ST installation for consistent golf simulator performance.
What Impact Screen Should You Use With BenQ LK936ST at Your Installation Distance?
Selecting the right impact screen is crucial for maximizing your BenQ LK936ST’s performance at your chosen installation distance. The screen material affects image brightness, color accuracy, and golf ball durability during impact. High-quality impact screens designed for golf simulators feature reinforced mesh construction that withstands repeated ball strikes. Screen size should match your installation distance—at 1.5 meters, choose 90 to 110-inch screens; at 2.0 meters, select 110 to 130-inch screens. The screen’s gain rating (typically 0.8 to 1.0 for golf simulators) determines light reflection and viewing angle consistency. Professional-grade screens cost more but deliver superior image quality and durability compared to budget alternatives.

Screen Selection Criteria
- Impact-rated material: specialized mesh withstands 100+ mph golf ball impacts
- Screen size: match to installation distance using throw ratio calculations
- Gain rating: 0.8-1.0 optimal for golf simulator applications and ambient light control
- Frame construction: rigid aluminum frames prevent sagging and image distortion
- Mounting system: wall-mounted or free-standing options based on room layout
- Warranty coverage: quality manufacturers offer 3-5 year warranties on impact screens
Screen maintenance extends lifespan and preserves image quality throughout your golf simulator investment. Clean screens monthly with microfiber cloths and mild detergent solutions. Avoid harsh chemicals that degrade mesh material or damage frame finishes. Proper screen care prevents premature replacement costs and maintains consistent simulator performance. Related content on reducing golf screen bounce back provides additional optimization techniques for your setup.
Key Takeaway: Choose impact-rated screens matching your installation distance with 0.8-1.0 gain rating for optimal BenQ LK936ST performance and durability.
What Are the Critical Calibration Steps After BenQ LK936ST Installation?
Calibration transforms your physical installation into a high-performing golf simulator by optimizing image geometry, focus, and color accuracy. Start with focus calibration using the projector’s manual focus ring and test patterns displayed on your impact screen. Adjust focus until all edges and center areas display sharp, crisp text and fine details. Next, use the LK936ST’s digital keystone correction to eliminate any remaining geometric distortion from non-perpendicular mounting angles. Color calibration ensures accurate golf course representation and proper ball tracking visibility. Most golf simulator software includes calibration utilities that guide you through these adjustments systematically.
Critical Calibration Checklist
- Focus calibration: adjust focus ring until test patterns display maximum sharpness
- Keystone correction: use digital correction for any remaining edge distortion
- Image geometry: verify 16:9 aspect ratio and centered positioning on screen
- Color temperature: calibrate to 6500K for accurate course representation
- Brightness levels: set to 75-80% for optimal performance without thermal stress
- Software integration: test with golf simulator application to verify tracking accuracy
Post-installation calibration typically takes 30-60 minutes for thorough completion. Use your golf simulator software’s built-in test patterns and alignment tools to verify proper setup. Document your calibration settings for future reference and troubleshooting. Professional installers often provide calibration services that guarantee optimal performance from day one. Regular recalibration every 6-12 months maintains consistent image quality as components age.
Key Takeaway: Systematic calibration of focus, keystone, geometry, and color ensures your BenQ LK936ST delivers accurate golf simulator performance after installation.
How Do You Maintain Optimal Performance at Your Installation Distance?
Ongoing maintenance preserves your BenQ LK936ST’s performance and extends equipment lifespan. The projector’s sealed laser engine requires minimal maintenance compared to lamp-based alternatives. Check cooling vents monthly and clean dust accumulation that reduces airflow and increases thermal stress. Monitor image brightness over time—if output decreases noticeably, verify ventilation paths and clean optical surfaces. The impact screen requires regular cleaning to maintain image clarity and visibility. Inspect mounting brackets and cables quarterly to ensure secure positioning and prevent safety hazards. Document all maintenance activities for warranty purposes and performance tracking.
Monthly and Quarterly Maintenance Tasks
- Clean projector cooling vents with compressed air to prevent dust accumulation
- Inspect impact screen for damage, tears, or material degradation
- Verify mounting bracket tightness and cable security
- Test focus and keystone settings to detect any drift from original calibration
- Check ambient room temperature and humidity levels for optimal operating conditions
- Review golf simulator software logs for tracking accuracy or performance issues
Environmental control is essential for long-term projector reliability. Maintain room temperature between 15-35°C and humidity below 80% to prevent component damage. Avoid direct sunlight exposure that accelerates material degradation and increases ambient light interference. If your simulator room experiences temperature fluctuations, consider installing a dedicated climate control system. These preventive measures eliminate costly repairs and maintain consistent simulator performance throughout your investment lifecycle.
Key Takeaway: Monthly ventilation cleaning and quarterly bracket inspections keep your BenQ LK936ST performing optimally at your chosen installation distance.
What Common Installation Distance Mistakes Should You Avoid?
Understanding common installation errors helps you avoid costly mistakes and performance degradation. The most frequent mistake is incorrect distance calculation that results in oversized or undersized projected images. Many installers ignore throw ratio formulas and rely on guesswork, leading to keystoning and edge distortion. Mounting the projector at incorrect angles causes geometric distortion that degrades simulator accuracy. Poor ventilation around the projector causes thermal throttling and reduced brightness output. Inadequate room lighting control allows ambient light to wash out the projected image and reduce contrast. These preventable errors compromise your simulator investment and user experience.
Common Mistakes and Solutions
- Incorrect distance: always use throw ratio formula (0.5 × screen width) for accuracy
- Non-perpendicular mounting: use laser levels to ensure projector lens faces screen directly
- Poor ventilation: maintain 15-20 cm clearance around projector for cooling airflow
- Inadequate light control: install blackout curtains and eliminate reflective surfaces
- Skipping calibration: perform complete focus and keystone calibration before use
- Ignoring screen quality: invest in impact-rated screens rather than budget alternatives
Professional installers avoid these mistakes through systematic planning and quality-focused execution. If you’re uncertain about any installation aspect, consult manufacturer documentation or hire experienced installers. Your BenQ LK936ST investment deserves proper setup that maximizes performance and durability. Taking time to do installation correctly eliminates expensive corrections later. Related guides on Uneekor Eye Mini Lite indoor setup and golf mat selection provide complementary setup information for comprehensive simulator environments.
Key Takeaway: Avoid installation distance miscalculations, poor mounting angles, inadequate ventilation, and insufficient light control that degrade BenQ LK936ST performance.
Is Your BenQ LK936ST Installation Complete and Ready for Golf Simulation?
Completing your BenQ LK936ST installation properly positions you for years of high-quality golf simulation and practice. The 1.5 to 2.5-meter installation distance range accommodates most home simulator spaces while maintaining excellent image quality. Proper throw distance calculation, room configuration, mounting, and calibration work together to deliver professional-grade performance. Your investment in quality screens, ventilation, and light control amplifies the projector’s capabilities. Regular maintenance preserves performance and extends equipment lifespan beyond manufacturer expectations. A well-installed BenQ LK936ST transforms your golf practice routine and provides entertainment value for family and guests. Take time to verify each installation step thoroughly before finalizing your setup.
Your home golf simulator represents a significant investment in skill development and enjoyment. Proper BenQ LK936ST installation distance planning and execution ensures you maximize that investment. The projector’s advanced optics and 4,000 ANSI lumens output deliver exceptional image quality when installed correctly. Combine your simulator with complementary equipment like Garmin Approach R50 for comprehensive performance tracking. Professional installation quality doesn’t require hiring expensive contractors—careful planning and systematic execution deliver excellent results. Your completed installation will provide years of consistent, accurate golf simulation performance.
Key Takeaway: Proper BenQ LK936ST installation at 1.5-2.5 meters, combined with quality screens and careful calibration, delivers professional-grade golf simulator performance for your home setup.
Frequently Asked Questions
What is the minimum room size needed for BenQ LK936ST installation?
Minimum room requirements include 3.5 meters depth (projector distance plus golfer stance), 2.5 meters width (screen accommodation), and 2.8 meters ceiling height (mounting and ventilation clearance). Smaller spaces may work with reduced screen sizes and adjusted throw distances. Professional installers can customize installations for tight spaces using wall-mounted brackets. Verify your specific room dimensions against projector specifications before purchasing equipment.
Can you install the BenQ LK936ST closer than 1.5 meters to the screen?
The BenQ LK936ST’s minimum installation distance is approximately 1.5 meters for optimal focus and image quality. Installing closer than 1.5 meters may cause focus issues and keystoning distortion. The 0.5 throw ratio is fixed and cannot be adjusted for shorter distances. If space is extremely limited, consider smaller screen sizes or alternative projector models with shorter throw ratios.
How does installation distance affect image brightness and quality?
Installation distance doesn’t significantly affect brightness output, which remains constant at 4,000 ANSI lumens. However, distance affects image size—greater distance produces larger projected images. Image quality depends more on focus calibration, screen quality, and light control than installation distance. Proper focus adjustment at your chosen distance ensures maximum sharpness and clarity across the entire screen surface.
Should you mount the BenQ LK936ST on the ceiling or wall?
Ceiling mounting is preferred because it prevents obstructions, maintains consistent distance, and eliminates user interference. Wall mounting works in some configurations but may create sight-line issues during golf swings. Ceiling brackets provide superior stability and allow precise angle adjustment for perpendicular screen alignment. Professional installations almost always use ceiling mounting for optimal performance and safety.
What happens if the BenQ LK936ST installation distance is incorrect?
Incorrect installation distance causes oversized or undersized projected images that don’t fill your impact screen properly. This wastes screen real estate or creates visible image edges. Keystoning and geometric distortion increase with distance errors. Recalculating distance using the 0.5 throw ratio formula and repositioning the projector corrects these issues. Always measure twice before finalizing mounting brackets.
How often should you recalibrate your BenQ LK936ST after installation?
Recalibrate every 6-12 months to maintain optimal performance as components age and environmental conditions change. Check focus and keystone settings monthly to detect any drift from original calibration. Professional installations often include calibration services guaranteeing optimal performance. Document all calibration adjustments for future reference and troubleshooting purposes.


Write Your Review
No reviews yet. Be the first to share your experience!